Friday, December 27, 2019

Two Paths into the (Food) Forest - Part 2 - Theory and Process

In part 1 I started describing the way my preferred, or maybe I should say habitual, definition of "food forest" has changed, and I hinted that there was a consequent difference in process between the way we started the first section of our food forest and the way we're starting the second section.

The first definition I described in part 1 focused more on the form of the forest (especially spatial characteristics); the second definition focuses more on function.
food forest2 an intentional assembly of trees and other plants that uses interactive diversity, vertical stacking (spatial strategy), and managed succession of species (temporal strategy) for the purpose of producing food and other products.
Yes, its form ends up being dense and reminiscent of a forest just like the first definition, but under the second definition this result is as incidental as it is unsurprising.  The first definition describes a static forest at climax (equilibrium) while the second also encompasses the natural dynamics that lead to climax.


 How does the difference in definitions affect the process of starting a food forest?  For us, we have seen a difference in imported vs. recycled nutrients, species composition (and how that changes over time), planting density (and how that changes over time), and the mechanisms used to nurture soil life.

We started the first section of our food forest by applying wood chip mulch liberally and planting food trees as saplings.  We applied compost and other organic fertilizers, and maintained the mulch layer by importing more mulch.  With time, effort, and imported material, this section is approaching the point where it will supply all of its own mulch.

We started the second section by planting "pioneer" (mostly legume) support species from seed: ground covers, bushes, and trees.  We covered these with a thin layer of straw mulch - just enough to slow evaporation and offer a little thermal insulation, but not too much to let some light through.  We selected pioneer species 1) with a preference for native species, 2) to grow quickly without fertilizer, 3) to prepare the soil (many by fixing nitrogen), and 4) to tolerate pollarding or coppicing.  If all goes well, by the time the annual ground cover dies out, the pioneer trees and bushes will have formed a low but tight protective canopy and start supplying woody mulch.

In the first section the soil life was slowly nurtured primarily by relying on a small but growing number of subsurface animals and fungi to carry nutrients from imported mulch and fertilizer down into the soil.

In the second section the soil life will be nurtured more quickly, primarily by relying on 1) live support plants to convert atmospheric gases into sugars and transport them down into the soil, and 2) symbiotically associated rhizobia (from the inoculants that we applied to the legume seeds) to convert atmospheric gases into subsurface fertilizers.

In the first section, we started with mostly productive trees planted at final forest density which slowly formed a canopy over 2-4 years, and now there's little room to add support trees.

In the second section, we're starting with an overly dense planting of support plants which will form a canopy within 3-4 months, and later we'll thin (pollard, coppice, or remove) them during strategic seasonal conditions to provide mulch and make room for productive trees.


I think I'll pause here for today, and maybe follow up with an entry about some detailed experimental strategies we used, including our support plant palette for a small Phoenix suburban site.

Friday, December 20, 2019

Two Paths into the (Food) Forest - Part 1 - Stories and Spaces

How do you start a food forest?  The answer may depend on how you define "food forest."

As I walk around the young food forest at Sage Garden Ecovillas, I often take note of things I'll do different next time I start a food forest.  The very definition of "food forest" that I gravitate toward now is different from the definition I had when we started this one.

When I first heard the term, I pictured a stand of trees that looked like a forest, but with species intentionally selected to produce food.  As I talked - "gossiped" may be more accurate - about food forests with other gardeners, urban farmers, ecovillage residents, and permaculturists, my mental image of the term incidentally acquired some depth and nuance, but it didn't fundamentally change.  So, when we started this food forest, my definition of the term was basically this:
food forest1 a really dense planting of food-producing trees and other plants in an arrangement that stacks multiple yields vertically on a single footprint of land and is incorporated into a permaculture design.
And I think that's a pretty common definition.  Only after our food forest started growing did I start to understand that the early pioneers who popularized the term understood it in subtly but importantly different ways.  I'm not saying the definition in common currency is invalid, and I'm not saying there's anything wrong with the corresponding methods used to start a food forest.  But I will say that after following that path once, I'm drawn to an alternative path suggested by the work of Geoff Lawton, one of the pioneers I mentioned.

When I say "pioneer," I should note something to be fair: Lawton didn't invent the concept or the term "food forest."  Robert Hart coined the term, but he didn't invent the concept either.  After creating such a forest, he learned that the practice was as ancient as it was obscure to western culture.  But even though Lawton's conception of "food forest" is modified from the original, ancient meaning, it's the one that intrigued me as I watched his video "Establishing a Food Forest."

This post is starting to get wordy, so let me leave theory for a bit and tell my own little story.

I imagined the "next time I start a food forest" wouldn't come until I opened the next experimental residence complex.  But I was wrong.

Right here at Sage Garden Ecovillas, the gradual expansion of the food forest
has encountered a barrier composed of the labyrinth, the future site of our pond, and a "low zone" imposed by traffic visibility requirements.  Together these form a sector where we don't plan to have any trees.  But in the disguise of an obstacle is the opportunity I've been waiting for to try a different approach - to take an alternative path into the food forest.
In the aerial view, the area outlined in red is the first food forest; in yellow is the forest-free sector; and in green is where we're planning the kernel of the second food forest.

I'll write later to describe in more detail the differences in theory and practice, but for now, I'll just hint that our second forest will involve more nutrient cycling right off the bat, less importing, and more support trees and sacrificial trees.

Sunday, April 21, 2019

Working with Nature and Mulberry Jam

One of the principles of permaculture is working with nature rather than against it.  I'm far from done learning how to do this.  Seems like I find myself contemplating how to stay out of nature's way about twice as often as trying to make something specific happen in our food forest.  But during a recent two week trip with some of my coworkers, I learned one of the benefits of this principle.  Near the end of the trip, while they were describing the tall weeds they would have to kill when they returned, I was instead looking forward to seeing all the progress nature had made in my absence.

I have to interject that Cina, the caretaker, has been watering the plants and trimming grass as needed.  That I can return home and enjoy the grounds is not just due to the self-caring design of the site, but also to her attention and work, which I'm very grateful for.


Here are just a few of the blessings I found when I returned.  The grape vines by the clothesline (above, left) are now growing a ridiculous number of grapes - over 100 bunches in just this area of the yard.  The Barbados cherry tree (above, center) is full of blossoms working on becoming cherries.  And the mulberry tree (above, right) is loaded with ripening mulberries.  Clearly, it's time to learn how to make mulberry jam.

So today that's what we did.

First, we spread a blanket under the tree (left).  We used one of the frost blankets that we use for olive harvesting.  Then we started knocking the berries into the blanket.  At first, we used shrub rakes to do this, but the tines kept getting caught in the branches, and I thought they might damage the delicate berries.  Next, we tried tapping the branches with six foot tree stakes to shake the berries loose (below).  This worked much better, and soon we had about three pints of berries (right).  We harvested only the berries that fell easily, and left the rest for the birds and for later harvesting.

Left some for the birds?  Why would we do that?

I think the conventional wisdom on this subject is that mulberries (like all garden yields) are scarce, and we have to keep the birds from taking them away from us.  I get that.  I think that way sometimes.  But there's also unconventional wisdom on this subject, which says mulberries are abundant.  And there's another principle of permaculture that says everything gardens.  If I can just get out of the way, nature assembles a dream team of gardeners - worms, grubs, clay, sun, wind, rain, fallen branches, fungi, bacteria, weeds, bugs, lizards, and yes, birds - who set about tending mulberry trees as if they were eager to make mulberries.  That's why we left some for the birds.

At last it was time to make the jam.  While our canning jars were being sterilized, we washed, sorted, and measured the best berries (below, left).  We tried to reduce the number of steps, because mulberries are very soft, and easily turn to mush.  We removed twigs, leaves, and unripe berries.  We decided for this inaugural batch to leave in some berries that were dark red (almost ripe), for a little tartness, but we removed those that were white or pink.  Then we added 3 1/2 cups of sugar and 3 Tablespoons of water and stirred (below, center).  Finally, we boiled the mixture and poured it into the jars (below, right).


One thing I'll do different next time is leave more room in the pan while boiling the berry-sugar mixture.  I was unable to sustain a rolling boil without making a mess, and as a result (I think) the jam wasn't as thick as I intended to make it.  It's somewhere between a thick syrup and a fully set jam.  But I have to say the flavor is outstanding.  Yes, I'm biased, and as I taste it, I'm thinking about the fact that it's organic and home grown, and I'm thinking about birds and bugs and branches and bacteria.  I'm thinking that the time I could have spent spraying poison on weeds, I spent instead harvesting and cooking.  But bottom line, I'm surprised how delicious it is, and I'll take it, bias and all.

Sunday, March 31, 2019

Spring 2019 Flowers and Fruit

Here are the latest flower buds, flowers, and fruits at Sage Garden Ecovillas.
Above are alpine strawberries (plus lavender). Below are blackberries (plus grapes and moringa) and mulberries.
The olive flowers are starting to bloom. Above is a closeup of olive flowers. In the picture to the left below, you can see just how thick the flowers are on the olives that have been mulched for two years now. Also below is the grape vine that grows on our clothesline.
Above and left is a new Anna apple that is just starting to bloom. Above and right are the companions around a gala apple, including Arizona milkweed (right), alyssum (left), and hollyhock (the large leaves). Below and left is a flower bud on the persimmon tree we just planted a few weeks ago. I was not expecting flowers for several years. Below and right you can see how many surprise flowers this tree is producing.
The picture above and left has four different kinds of flowers, so I circled them in four different colors. The Thai lime flowers are circled in green, the orange in orange, the bloodflower milkweed in red, and the lavender in lavender. Above and right is a flower on one of our green onions. We'll see if they reseed among the mint.
Now we're stretching the word "fruit" a bit. Above and left is a mystery grain growing from seeds in the straw that we used for mulch. This straw is cut from some kind of edible grain crop, so we'll see what happens when they're ready to harvest. One of the senna bushes is in the background. Above and right is the latest picture of some of our mango flowers, in which you can see the lengthening stems on which the fruit will hang.  Pineleaf milkweed and more mystery grain are in the background. And below are some fruiting bodies. Not only are these blue oyster mushrooms delicious, nutritious, and beautiful, they're also growing in our wood chip mulch (although the one in this picture is growing in straw) where they recycle our pruned branches into rich soil for our trees.

Sunday, March 24, 2019

Spring 2019 Flowers

This year we planted milkweed to attract monarch and queen butterflies.  On the left (foreground) is an Arizona milkweed by the gala apple. alyssum is blooming in the background. On the right is a bloodflower milkweed.
Elderberries on the left. Mulberries on the right (the fuzzy green flowers in the foreground).
First place for strongest fragrance goes to the orange on the left. Second place to the senna in the background on the right (yellow flowers). The flowering tree in the foreground is a peach.
I think third place would go to the lavender on the right. The pineapple guava on the left is starting to show gray-green flower buds.
Banana on the left. Mango on the right.
Aloe on the left. Curry tree on the right.
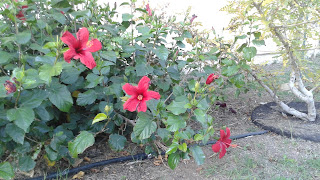
Hibiscus. To the right is the frankincense tree.
The olive trees (left) are thick with flowers this year. On the right is the almond tree.